

Overview
Physical documents can be forged, altered, or entirely fabricated. Verify Group’s Document Authenticity and Asset Verification tools use a combination of optical character recognition (OCR), AI-powered image analysis, and direct registry lookups to confirm whether a document is genuine. When to use document verification:- Before accepting a national ID, passport, or driver’s licence as proof of identity
- When processing an insurance claim and reviewing submitted supporting documents
- When verifying vehicle ownership for motor insurance underwriting
- When confirming a KRA PIN or business registration number submitted by a customer
Document Authenticity
What documents can be verified?
Verify Group can authenticate the following document types:Step 1 — Open Document Authenticity
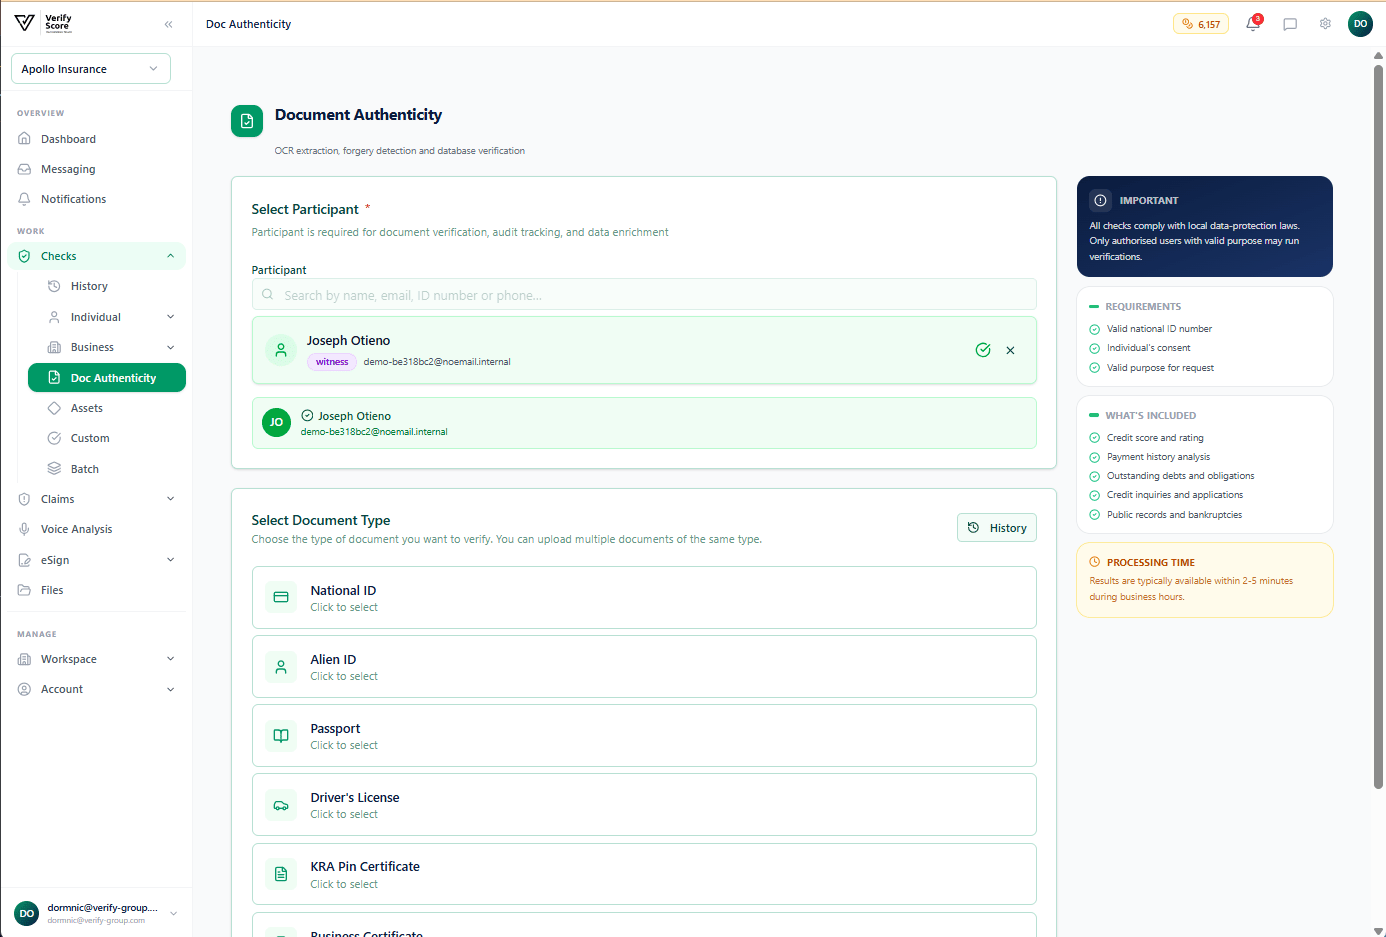
- Select the document type from the dropdown list
- Select the country that issued the document
- Choose the verification scenario (e.g., identity confirmation, ownership verification, compliance screening)
Step 2 — Upload the document
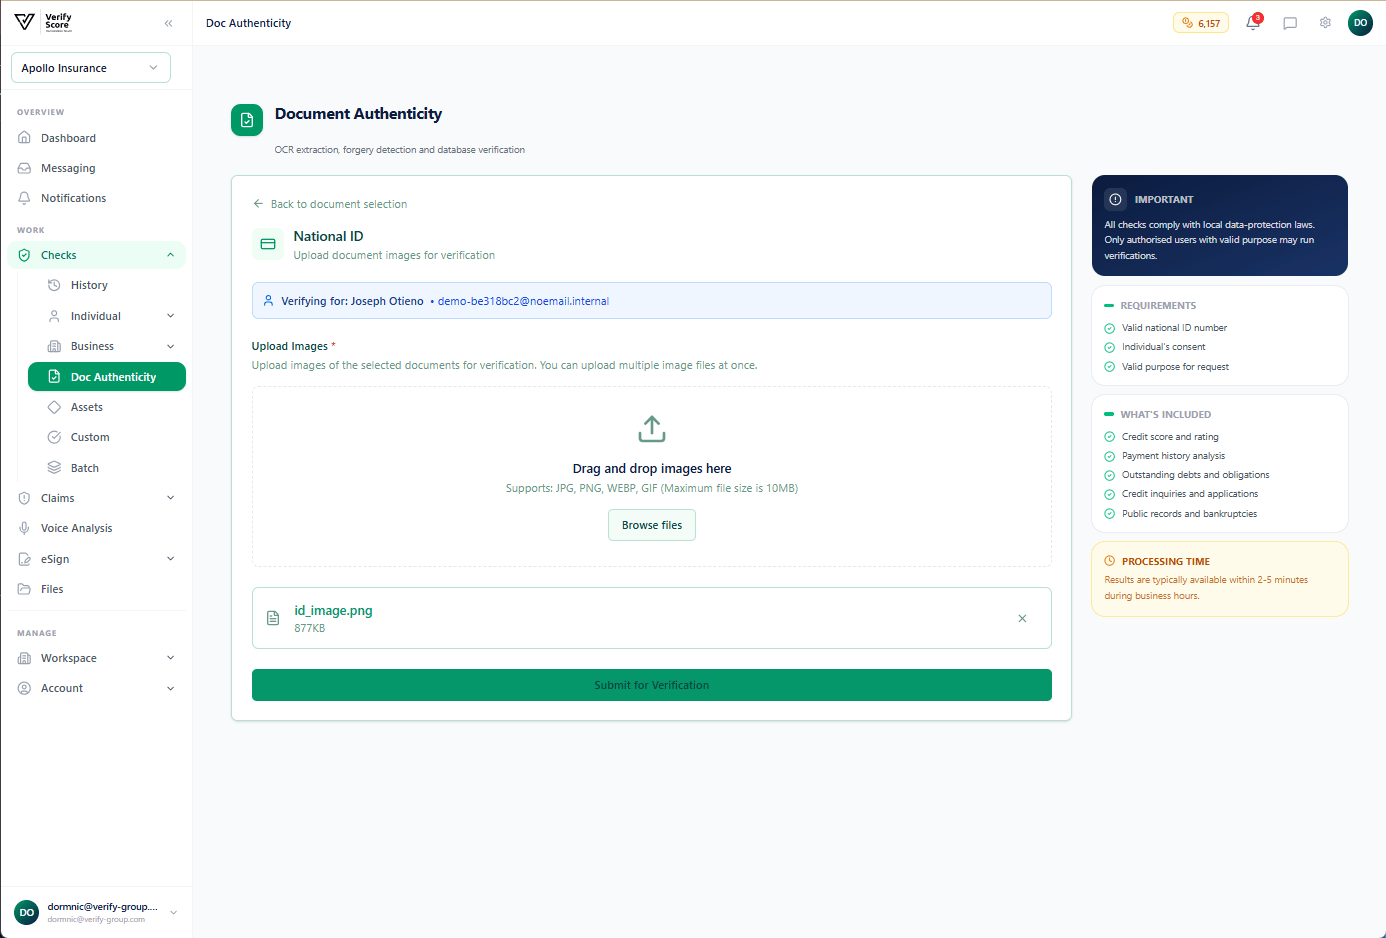
- Drag and drop an image file (JPG, PNG, or PDF) of the document
- Click to browse your computer’s file system and select the file manually
- Scan or photograph the document in good lighting, flat on a surface
- Ensure all four corners of the document are visible
- Make sure the text is sharp and legible — blurry images may produce inaccurate results
- Upload the front and back of two-sided documents (such as national IDs and driver’s licences) as separate files
Step 3 — Review the authenticity result
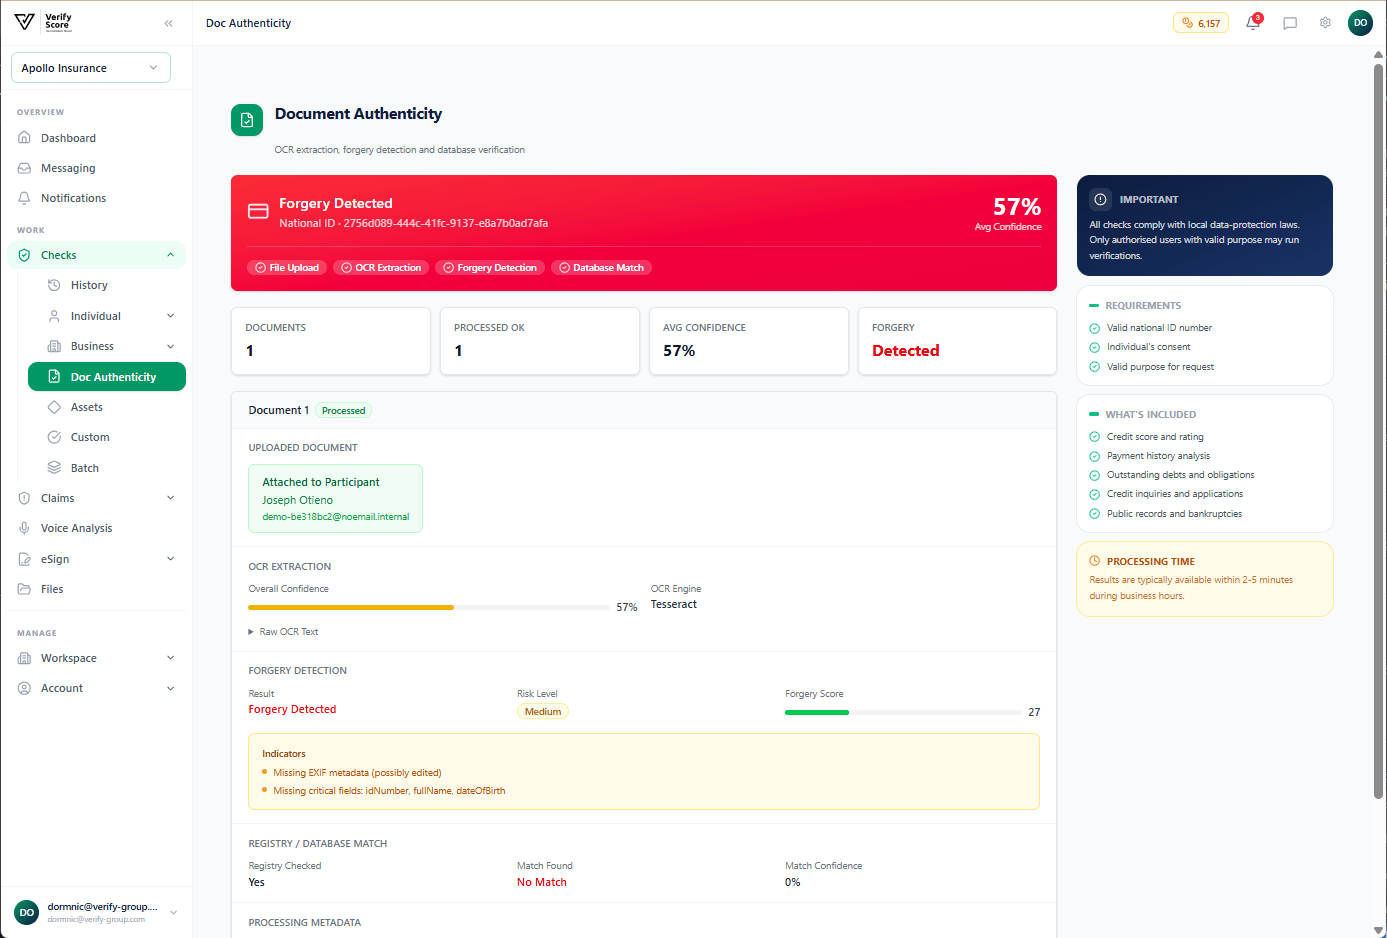
- A percentage score from 0–100 representing how confident the system is that the document is genuine
- Individual sub-scores for Print Quality, Security Features, Data Consistency, and Registry Match
- All text extracted from the document by OCR — name, ID number, date of birth, expiry date, etc.
- A side-by-side comparison of the extracted data against the information submitted (if a participant record was linked)
- Authentic (green) — the document passed all checks
- Suspicious (amber) — one or more checks flagged a potential issue; manual review recommended
- Rejected (red) — the document shows clear signs of tampering or forgery
An Authentic result means the document passed automated checks. It does not replace a physical inspection by a trained document examiner for high-stakes decisions. For critical cases, always combine automated verification with a manual review.
Asset Verification
Asset verification confirms the details of physical assets — primarily vehicles — by looking up their official registry records.Step 1 — Open Asset Verification
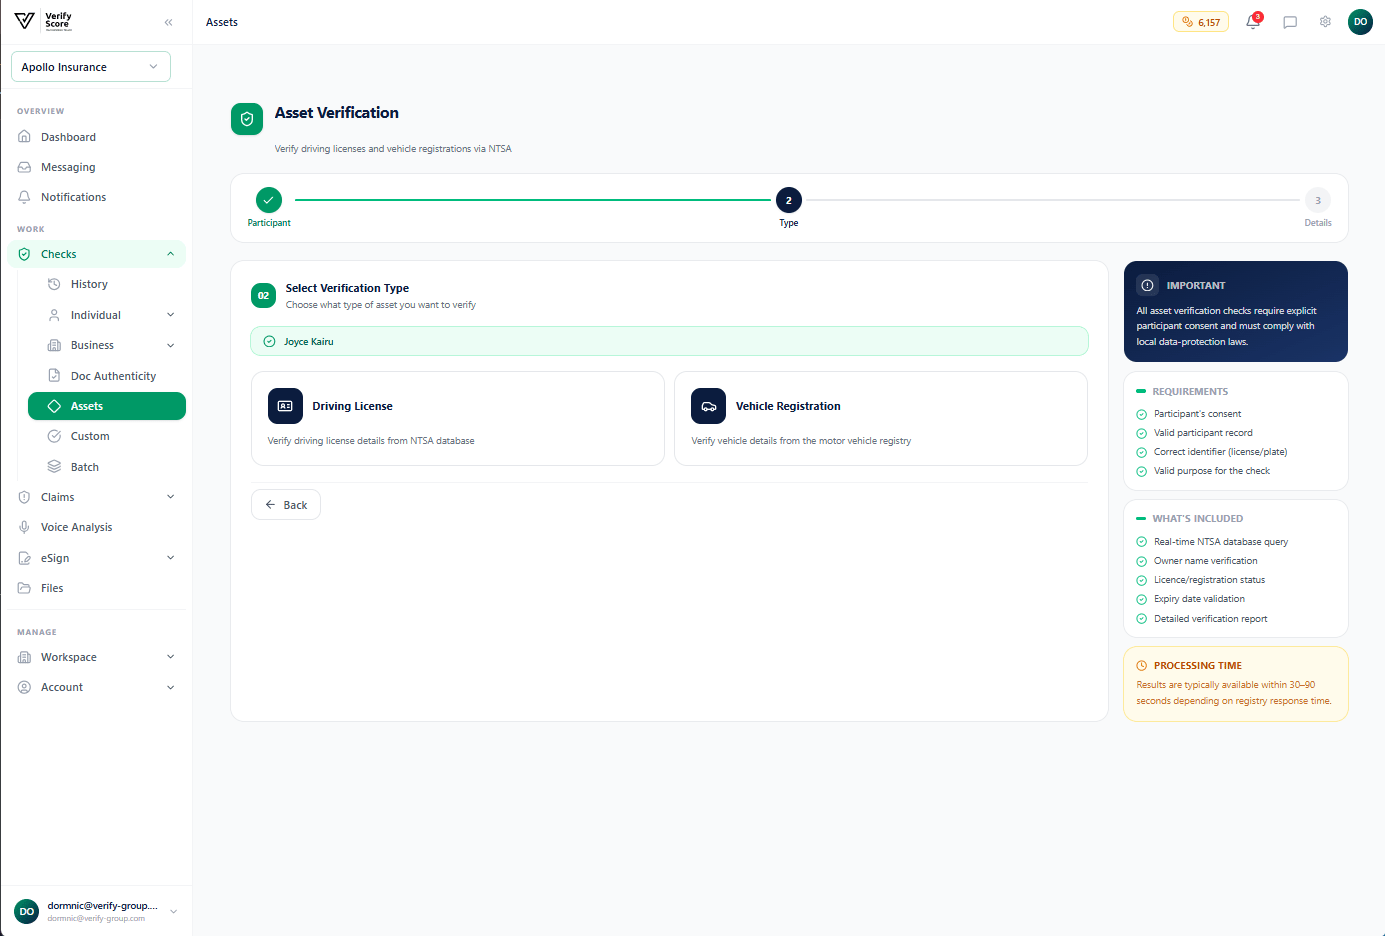
- Asset Type — currently supports Vehicles (motor, motorcycle, commercial)
- Identifier Type — choose between Registration Plate or Chassis Number (VIN)
- Identifier Value — type the plate number or chassis number exactly
Step 2 — Review the asset result
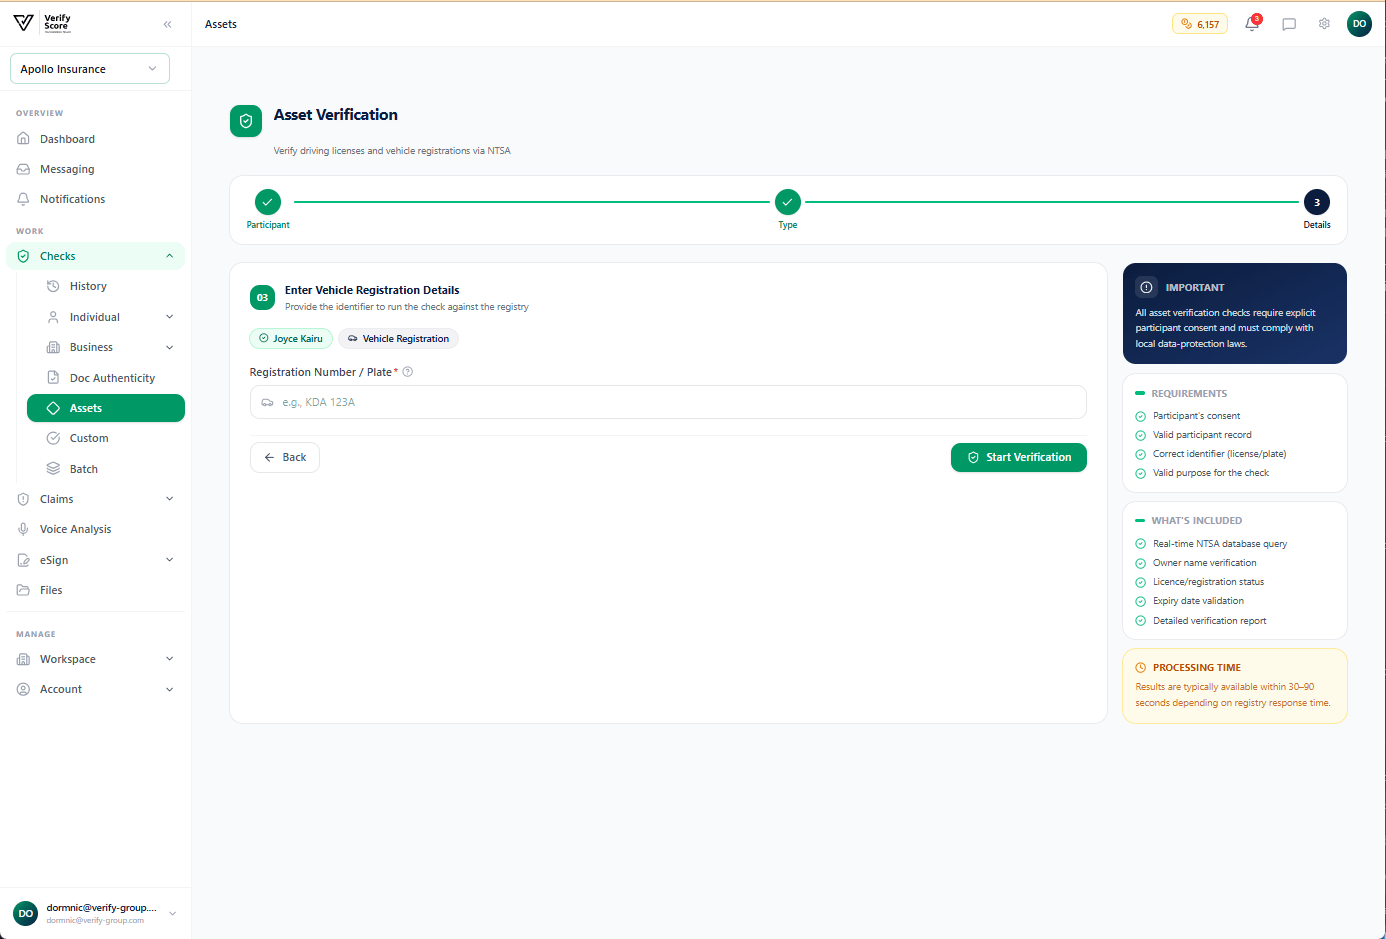
For motor insurance claims, attach the asset verification result directly to the claim record by clicking Link to Claim on the result screen and selecting the relevant claim from the dropdown.
Next steps
Custom Checks
Build your own verification scenarios for documents not covered by the standard flows.
Claims Management
Attach verified documents and asset details to an insurance claim.